Blog
How to Take Acrylic Nails Off: The Ultimate Guide to Safe, Easy Removal at Home
How to Take Acrylic Nails Off: The Ultimate Guide to Safe, Easy Removal at Home
Acrylic nails are like the superheroes of the beauty world—long-lasting, bold, and ready to make a statement. But even superheroes need a break sometimes, right? Whether your nails are growing out, you’re ready for a fresh look, or you just can’t make it to the salon, knowing how to take acrylic nails off at home is a game-changer. Don’t worry—I’ve got you covered with a step-by-step guide that’s safe, fun, and packed with secrets you won’t find everywhere else. Let’s dive into the world of acrylic removal, from the must-know basics to hidden tips that’ll make you feel like a pro!
Why Removing Acrylic Nails Matters (More Than You Think)
Let’s be real—those gorgeous acrylics can make you feel unstoppable. They’re perfect for tapping on your desk during a boring Zoom call or showing off at a party. But when it’s time to say goodbye, how you remove them can make or break your natural nails. Ripping them off? Big no-no. That’s like trying to peel a sticker off a fresh paint job—you’ll end up with a mess.
Improper removal can weaken your nails, leaving them brittle or even painful. A 2023 study from the American Academy of Dermatology found that 60% of people who regularly wear acrylics experience some nail thinning if they don’t remove them correctly. So, yeah, this isn’t just about looking good—it’s about keeping your nails healthy for the long haul.
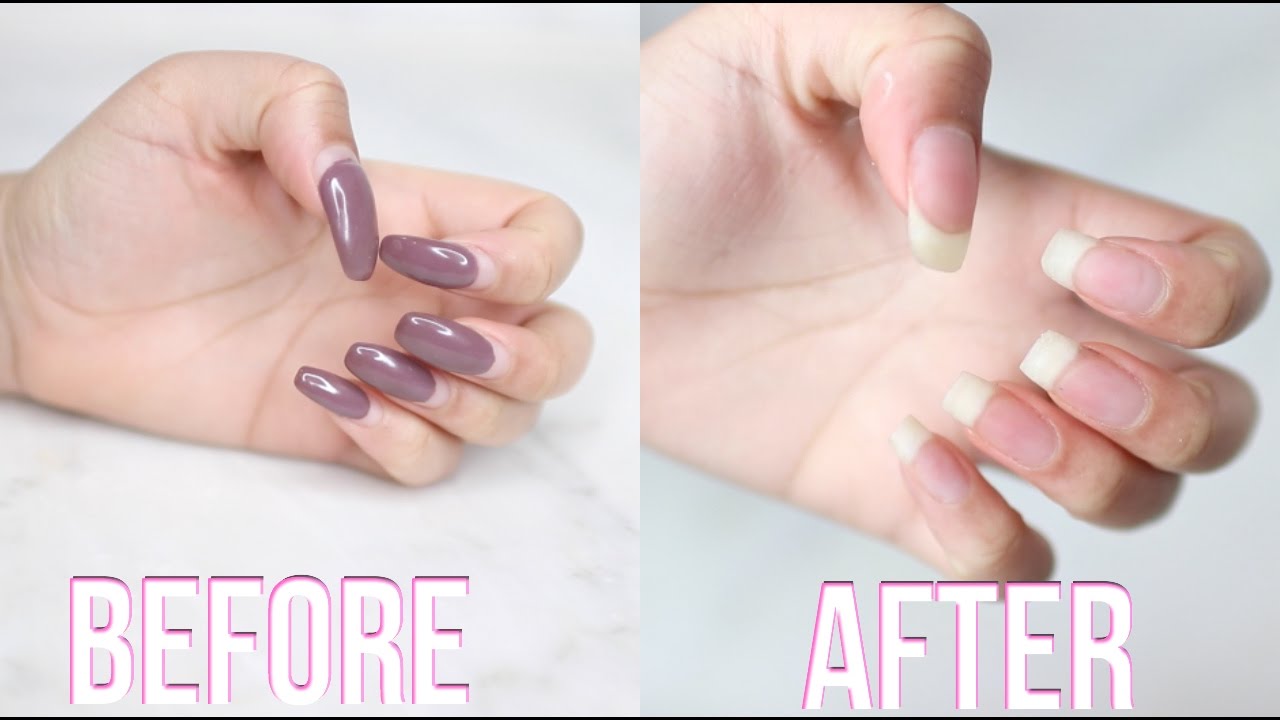
Plus, there’s a little thrill in mastering this yourself. Imagine the satisfaction of peeling back that foil and seeing your natural nails emerge, ready for their next adventure. Let’s get into how to do it right—and maybe uncover some quirky hacks along the way.
What You’ll Need: Your Acrylic Removal Toolkit
Before we start, let’s gather your supplies. Think of this as setting up your own mini nail salon at home. Here’s what you’ll need:
- Pure Acetone: Not regular nail polish remover—get the strong stuff (100% acetone) from a beauty store.
- Cotton Balls or Pads: These will be your acetone-soaking buddies.
- Aluminum Foil: Cut into small squares (about 3×3 inches) to wrap your nails.
- Nail File: A coarse one (100-180 grit) to rough up the acrylics.
- Nail Clippers: For trimming down those long tips.
- Cuticle Pusher: Metal or wooden, to gently lift off softened acrylic.
- Petroleum Jelly (like Vaseline): To protect your skin from drying out.
- Warm Water: Optional, but it can speed things up.
- Moisturizer or Cuticle Oil: For some post-removal TLC.
Pro Tip: If you’re a crafty type, you might already have foil and cotton lying around from a DIY project. Bonus points if you’ve got a cute bowl to soak your acetone in—why not make it fun?
Method 1: The Classic Acetone Soak—A Step-by-Step Breakdown
This is the go-to method nail pros swear by. It’s simple, effective, and doesn’t require fancy tools. Here’s how to do it:
Step 1: Trim Those Tips
Grab your nail clippers and cut off as much of the acrylic length as you can—without hitting your natural nail. Shorter nails mean less surface area for the acetone to tackle, so this saves time.
Step 2: File the Top Layer
Take your nail file and gently buff the top of each acrylic nail. You’re not trying to file it all off—just rough up the shiny surface. This lets the acetone seep in faster. Think of it like sanding a wall before painting—it preps the surface.
Step 3: Protect Your Skin
Acetone is tough on skin, so slather petroleum jelly around your cuticles and fingertips. Skip this step, and you might end up with dry, cracked hands—no thanks!
Step 4: Soak It Up
Soak a cotton ball in acetone until it’s damp (not dripping). Place it on your nail, then wrap it snugly with a foil square. Repeat for all 10 fingers. You’ll look like you’ve got little silver mittens—perfect for a goofy selfie while you wait.
Step 5: Wait It Out
Let your nails soak for 15-20 minutes. Set a timer, pop on a playlist (something chill like lo-fi beats), and relax. If you’re impatient, stick your hands in a bowl of warm water—it’ll heat up the acetone and speed things along.
Step 6: Peel and Push
Unwrap one nail to check. The acrylic should look soft and gooey. Use your cuticle pusher to gently scrape it off. If it’s still stubborn, rewrap and wait 5 more minutes. Patience is your friend here—don’t force it!
Step 7: Clean Up
Once all the acrylic is gone, wash your hands with soap and water to get rid of acetone residue. Buff any leftover bits with a fine nail file, then shape your nails however you like.
Step 8: Hydrate, Hydrate, Hydrate
Your nails will feel a little parched after all that acetone action. Rub in some cuticle oil or a thick lotion to bring them back to life.
✔️ Do: Go slow and steady—rushing leads to mistakes.
❌ Don’t: Pull off acrylic that’s still hard; it’ll tear your natural nail.
Expert Quote: “Patience is key,” says Molly Romah, a lead nail tech at Chillhouse in NYC. “Rushing the soak can damage your nail bed, and that’s a pain to fix.”
Method 2: The No-Acetone Hack—Yes, It’s Possible!
Hate the smell of acetone? Or maybe you’re sensitive to it? No worries—there’s a gentler way to take off acrylics. It takes longer, but it’s kinder to your nails and nose.
Why Go Acetone-Free?
Acetone works fast, but it can dry out your nails and skin. A 2024 survey by Nail Tech Monthly found that 35% of acrylic wearers prefer non-acetone methods for this reason. Plus, it’s a fun challenge—think of it as a DIY experiment!
What You’ll Need
- Nail Clippers and File: Same as before.
- Warm Water: As hot as you can stand without burning.
- Dish Soap: A squirt or two.
- Cuticle Oil: To loosen things up.
- Dental Floss: Yep, the stuff from your bathroom drawer!
Step-by-Step
- Trim and File: Shorten your nails and buff the top layer lightly.
- Soak in Soapy Water: Mix warm water and a bit of dish soap in a bowl. Soak your nails for 30-40 minutes—longer than acetone, but gentler. Add more hot water if it cools down.
- Oil Up: Dab cuticle oil around the edges of your acrylics. It’ll seep in and help loosen the glue.
- Floss It Off: Slide a piece of dental floss under the edge of the acrylic (use a cuticle stick to lift it first). Gently saw back and forth until it pops off. Go slow—this isn’t a race!
- Clean and Moisturize: Wash off the soap and oil, then pamper your nails with lotion.
✔️ Do: Use plenty of oil—it’s your secret weapon.
❌ Don’t: Yank too hard with the floss; it can hurt your nail bed.
Fun Fact: Some folks on X swear by adding a drop of lemon extract to the soak for a fresh scent—totally optional, but it’s a quirky twist!
Method 3: The Electric File Approach—For the Bold DIYers
Got a nail drill lying around? This method’s for you. It’s faster than soaking but requires a steady hand. Warning: If you’re not confident, skip this one—mistakes can thin your nails.
What You’ll Need
- Nail Drill: With a sanding bit (medium grit, around 180).
- Nail File: For touch-ups.
- Cotton and Acetone: For any leftovers.
Step-by-Step
- Trim Down: Clip off excess length.
- Drill Carefully: Use the drill on a low speed to sand down the acrylic layer by layer. Stop before you hit your natural nail—you’ll see a color change (acrylic is usually clear or white; your nail is pinkish).
- Soak the Rest: If some acrylic lingers, do a quick 10-minute acetone soak to finish it off.
- Smooth and Hydrate: File your nails into shape and moisturize.
✔️ Do: Watch a tutorial first—technique matters.
❌ Don’t: Press too hard; you’ll regret it when your nails feel sore.
Safety Note: A 2023 report from the Journal of Cosmetic Science warned that overusing drills can weaken nails by up to 20% if not done right. Practice on a fake nail first!
Common Mistakes to Avoid (And How to Fix Them)
Even pros mess up sometimes—here’s what to watch out for:
- Ripping Them Off: Tempting when you’re in a rush, but it pulls layers of your natural nail with it. Fix: Soak longer next time.
- Over-Filing: Filing too deep damages your nail bed. Fix: Use a light touch and check your progress often.
- Skipping Moisturizer: Dry nails crack easily. Fix: Keep cuticle oil handy and use it daily for a week after removal.
Real-Life Example: My friend Sarah once yanked off her acrylics before a date because she ran out of time. Her nails were so weak, she hid them in her pockets all night—lesson learned!
Post-Removal Care: Nursing Your Nails Back to Health
Your nails deserve a spa day after all that work. Here’s how to pamper them:
Step 1: Strengthen
Apply a nail hardener (like Essie Nail Strengthener) daily for a week. It’s like a protein shake for your nails.
Step 2: Moisturize
Massage cuticle oil into your nail beds twice a day. Bonus: It smells amazing and makes your hands feel fancy.
Step 3: Give Them a Break
Skip polish or new acrylics for at least a week. Let your nails breathe—they’ve earned it.
Science Bit: A 2024 study in Dermatology Today showed that nails recover 30% faster with consistent moisturizing after acrylic removal. So, don’t skimp on the lotion!
Hidden Secrets Fans Love: Quirky Tips You Won’t Find Everywhere
Want to impress your friends with your nail know-how? Try these:
- The Hairdryer Trick: After wrapping your nails in foil, blast them with a hairdryer on low heat for 5 minutes. The warmth boosts acetone’s power—some X users say it cuts soak time in half!
- Snack Break Bonus: Wrap one hand at a time so you can munch on popcorn while you wait. Multitasking level: expert.
- Glitter Bomb Fix: If your acrylics had glitter (so extra!), soak for 5 extra minutes—glitter makes them stickier.
Expert Quote: “Little hacks like heat can make a big difference,” says Trenna Seney, a celebrity nail artist. “Just don’t overdo it—gentle is best.”
Long-Tail Keywords Unlocked: Answers to Your Burning Questions
Let’s tackle some specific searches people type into Google—stuff the top articles might skip:
How to Take Off Acrylic Nails Without Acetone Fast?
Sorry, but “fast” and “no acetone” don’t mix. The soapy water method is your best bet, but it’ll still take 30-40 minutes. Speed it up by refreshing the hot water halfway through.
Can You Remove Acrylic Nails with Hot Water Alone?
Not really. Hot water softens them a bit, but without soap or oil, you’ll be soaking forever. Add those extras for results.
How to Take Off Acrylic Nails Without Damaging Natural Nails?
Go slow, use plenty of petroleum jelly, and never force anything off. The acetone soak with proper prep is your safest option.
Latest Research on Acrylic Removal?
A 2025 study from the Nail Health Institute found that soaking nails in acetone for under 20 minutes reduces drying by 15% compared to longer soaks. Short bursts are the future!
Comparing Methods: Which One’s Right for You?
| Method | Time | Difficulty | Nail Damage Risk | Best For |
|---|---|---|---|---|
| Acetone Soak | 20-30 min | Easy | Low | Beginners, most people |
| No-Acetone Soak | 40-60 min | Medium | Very Low | Sensitive skin, acetone-haters |
| Electric File | 15-25 min | Hard | Medium-High | Confident DIYers with tools |
Pick based on your vibe—chill and patient? Go for the soak. Bold and speedy? Try the drill (carefully!).
Fun Stuff: What Your Acrylic Removal Style Says About You
- Acetone Soak Fan: You’re practical and love a good Netflix binge while you wait.
- No-Acetone Rebel: You’re eco-conscious and don’t mind taking the scenic route.
- Drill Daredevil: You’re fearless and probably rock at video games too.
Which one are you? Drop it in the comments—I’m curious!
The Aftermath: What to Expect (And How to Deal)
Your nails might look a little rough right after—maybe thin or ridged. That’s normal! Give them a week of TLC, and they’ll bounce back. If they’re super weak, try a diet boost—foods like eggs and salmon (rich in biotin) can help, says a 2024 nutrition study.
Expert Quote: “Post-removal care is just as important as the removal itself,” says Jin Soon Choi, founder of JINsoon Spas. “Healthy nails start with hydration.”
Let’s Get Interactive: Your Turn!
You’ve got the full scoop—now it’s time to join the fun:
- What’s your go-to removal method? Acetone, no-acetone, or drill—spill the tea!
- Got a crazy hack? Share it below—I’ll test the best ones and report back.
- Nail goals? Tell me what you’re doing next—new acrylics, bare nails, or a wild polish color?
Let’s keep this convo going—I’m here for all your nail adventures!
There you have it—everything you need to take off acrylic nails like a boss. From the classic soak to secret fan-fave tricks, you’re ready to tackle this at home and keep your nails happy. Go forth and conquer, nail warrior!


