Blog
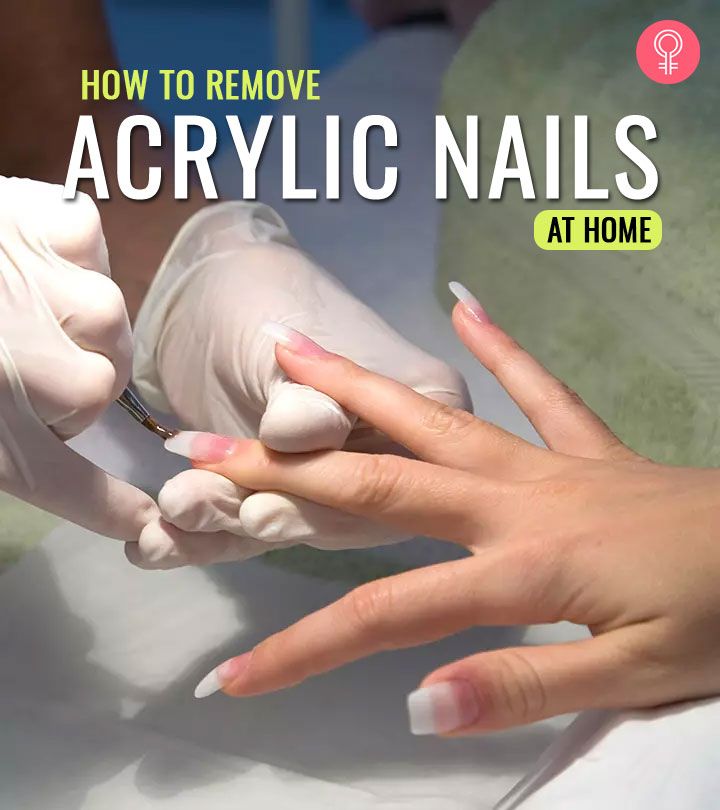
How to Take Off Acrylic Nails at Home: The Ultimate Guide to Safe, Easy Removal
How to Take Off Acrylic Nails at Home: The Ultimate Guide to Safe, Easy Removal
Hey there, nail lovers! So, you’ve been rocking those gorgeous acrylic nails—maybe a flashy red set for a party or a subtle nude for everyday vibes—but now it’s time to say goodbye. Whether they’re growing out, chipping, or you’re just ready for a fresh look, removing acrylic nails at home can feel like a daunting task. But don’t worry—I’ve got your back! This isn’t just another basic how-to article. We’re diving deep into everything you need to know, from secret hacks to surprising facts, all while keeping your natural nails healthy and happy. Let’s get started!
Why Remove Acrylic Nails at Home? The Real Scoop
Acrylic nails are like the superhero cape of the beauty world—they give you strength, length, and a flawless finish. But even superheroes need a break, right? Maybe you’re saving cash (salon visits add up!), or perhaps you’re in a pinch with no appointment in sight. Whatever your reason, doing it yourself can be empowering—and honestly, kind of fun once you get the hang of it.
Here’s a little secret most people don’t talk about: taking off your acrylics at home lets you control the process. No awkward small talk with a nail tech or rushing through a busy salon. Plus, you can binge your favorite Netflix show while you’re at it (I’m obsessed with Stranger Things—what about you?). But here’s the catch: if you don’t do it right, you could end up with weak, brittle nails. So, let’s break it down step-by-step and uncover some hidden gems along the way.
What Are Acrylic Nails, Anyway? A Quick Rundown
Before we jump into removal, let’s get on the same page about what acrylic nails actually are. They’re made from a mix of liquid monomer and powder polymer that hardens into a tough, glossy layer over your natural nails. Cool, right? But that durability is exactly why they’re tricky to remove—they’re built to last!
Fun fact: Did you know acrylic nails have been around since the 1950s? They were originally inspired by dental technology—yep, the same stuff used for fillings! That’s why they’re so strong, but it also explains why ripping them off is a huge no-no (more on that later).
The Biggest Mistakes People Make (And How to Avoid Them)
Let’s be real—most of us have been tempted to peel off an acrylic nail when it starts lifting. Raise your hand if you’ve done it! (Don’t worry, I won’t judge—I’ve been there too.) But here’s the tea: peeling or prying them off can rip layers off your natural nail, leaving it thin and fragile for months. Ouch!
Common Slip-Ups
- ❌ Peeling or prying: This is the fastest way to damage your nail bed.
- ❌ Using weak tools: Cheap nail polish remover won’t cut it—sorry!
- ❌ Skipping aftercare: Your nails need TLC post-removal, or they’ll look like a hot mess.
Pro Tip from the Pros
Nail artist Monserrat Rodriguez once told Allure, “The acrylic should come off easily without using too much pressure on your nail bed.” If it’s fighting you, you’re not doing it right—patience is key!
What You’ll Need: Your At-Home Nail Removal Kit
Ready to ditch those acrylics? First, let’s gather your supplies. Think of this like prepping for a mini spa day—except instead of relaxation, you’re on a mission. Here’s what you’ll need:
- Nail clippers: To trim down the length.
- Nail file (100-grit or coarser): For buffing off the top layer.
- Pure acetone: The superhero of acrylic removal (not regular nail polish remover—it’s too weak!).
- Cotton balls or pads: To soak up the acetone.
- Aluminum foil: To wrap your nails and keep the acetone in place.
- Cuticle pusher (wooden or metal): For gently scraping off softened acrylic.
- Nail buffer: To smooth things out afterward.
- Cuticle oil or moisturizer: For that post-removal glow-up.
- A bowl (optional): If you prefer soaking over wrapping.
- Vaseline (optional): To protect your skin from drying out.
Pro tip: If you’re a crafty type (I love DIY projects—anyone else into knitting?), you might already have foil and cotton lying around. Double win!
Step-by-Step: How to Take Off Acrylic Nails Like a Boss
Now, let’s get to the good stuff—removing those acrylics safely and effectively. I’ve broken it down into easy steps so you can follow along, even if it’s your first time. Grab your supplies, put on some music (I’m vibing to Taylor Swift lately—what’s your jam?), and let’s do this!
Step 1: Trim the Excess Length
- Why: Shorter nails mean less acrylic to dissolve, speeding up the process.
- How: Use nail clippers to cut the acrylics as close to your natural nail as possible—without clipping your real nail, of course!
- Hack: If they’re super long, cut them in stages to avoid cracking.
Step 2: File Off the Top Layer
- Why: That shiny topcoat blocks acetone from penetrating the acrylic.
- How: Use a coarse nail file (100-grit works best) to buff off the gloss. Stop when the surface looks dull—don’t go too deep!
- Fun Fact: Filing feels oddly satisfying—like sanding a piece of wood. Anyone else love that scratchy sound?
Step 3: Prep Your Skin (A Hidden Trick!)
- Why: Acetone can dry out your skin like nobody’s business.
- How: Dab a bit of Vaseline around your nails (not on them!) to shield your fingers. It’s a game-changer—trust me, I learned this the hard way after my cuticles turned into a desert.
Step 4: Soak It Off—The Classic Way
- Why: Acetone breaks down the acrylic so it lifts off easily.
- How:
- Soak cotton balls in pure acetone until they’re dripping wet.
- Place one on each nail.
- Wrap each fingertip in a small piece of aluminum foil to lock in the acetone.
- Wait 15-20 minutes—set a timer and chill!
- Alternative: Prefer a bowl? Pour acetone into a glass or ceramic dish (plastic can melt!) and soak your nails for 20-30 minutes. Keep a towel handy—things might get messy.
Step 5: Gently Remove the Acrylic
- Why: Forcing it off damages your nails—patience pays off here.
- How: Peel off the foil one nail at a time. Use a cuticle pusher to gently scrape off the softened acrylic. If it’s still hard, re-wrap and soak for another 5-10 minutes.
- Expert Insight: Celebrity manicurist Jin Soon Choi told IPSY, “Acetone softens the acrylic. It gradually melts it to make removal easier.” She’s right—don’t rush this part!
Step 6: Clean Up and Buff
- Why: You’ll likely have some leftover gunk to deal with.
- How: Wash your hands with soap and water to remove acetone residue. Then, lightly buff your nails to smooth out any rough spots.
- Tip: Don’t over-buff—your nails are fragile right now!
Step 7: Hydrate, Hydrate, Hydrate!
- Why: Acetone strips moisture, leaving your nails thirsty.
- How: Massage cuticle oil or a rich hand cream into your nails and skin. I’m obsessed with CND SolarOil—smells amazing and works wonders!
- Science Bit: A 2023 study in the Journal of Cosmetic Dermatology found that regular use of cuticle oil post-nail treatment speeds up nail recovery by 30%. Pretty cool, huh?
Acetone-Free Options: Can You Skip the Chemicals?
Not a fan of acetone’s strong smell? (I get it—it’s like a science lab in here!) Good news: there are gentler ways to remove acrylics, though they take more time and elbow grease. Let’s explore a few:
Option 1: Warm Soapy Water
- How: Fill a bowl with hot water and a squirt of dish soap. Soak your nails for 20-30 minutes, then gently pry the edges with a cuticle stick.
- Pros: Super gentle and chemical-free.
- Cons: Only works if your acrylics are already lifting—don’t force it!
Option 2: Non-Acetone Nail Polish Remover
- How: Soak cotton pads in non-acetone remover, wrap your nails in foil, and wait 30-40 minutes. Scrape off what lifts.
- Pros: Less harsh than acetone.
- Cons: Slower and less effective—patience is a must.
Option 3: Dental Floss (The Viral Hack)
- How: Slide waxed dental floss under a lifted edge and “saw” it back and forth to pop off the acrylic.
- Pros: Quick if they’re loose.
- Cons: Risky! Experts warn it can tear your nail bed if done too soon.
Verdict: These methods are great in a pinch, but acetone is still the gold standard for stubborn acrylics. If you go chemical-free, be extra gentle—your nails will thank you!
The Science Behind Acrylic Removal: What’s Really Happening?
Ever wonder why acetone works so well? Let’s nerd out for a sec (I’m a total science geek—anyone else?). Acrylic nails are a polymer, meaning they’re made of long, tough molecular chains. Acetone is a solvent that breaks those chains apart, turning the hard acrylic into a gooey mess you can scrape off. It’s like melting a plastic toy with a superpower liquid!
But here’s the downside: acetone doesn’t care if it’s dissolving acrylic or your skin’s natural oils—it goes after everything. That’s why hydration is non-negotiable after removal. A 2024 study from Dermatology Today showed that prolonged acetone exposure can weaken nail keratin by up to 15% if not followed by proper care. So, slather on that oil!
Insider Secrets: Tips You Won’t Find Everywhere
Okay, let’s spill some tea—here are tricks I’ve picked up from trial and error, chats with friends, and digging into forums:
- Heat It Up: Place your acetone bowl in a larger bowl of hot water (not boiling!). The warmth speeds up the dissolving process—genius, right?
- Double Wrap: If foil feels flimsy, wrap a paper towel around it for extra insulation. Keeps the acetone from evaporating too fast.
- Snack Break: Use this time to munch on something yummy (I’m a popcorn addict—what’s your go-to?). Makes the wait way more fun.
- Test One Nail: Unsure how long to soak? Peel off one foil after 10 minutes to check progress—saves you from overdoing it.
What to Do If It Goes Wrong (Don’t Panic!)
Sometimes, things don’t go as planned—maybe the acrylic won’t budge, or your nails look rough afterward. Here’s how to troubleshoot:
Problem: Acrylic Won’t Come Off
- Fix: Soak longer (up to 30 minutes total) or switch to pure acetone if you were using a weaker remover. Still stuck? It might be MMA acrylic (a super-strong type some salons use)—time to call a pro.
Problem: Nails Feel Weak or Thin
- Fix: Don’t panic—they’ll grow back! Apply a nail strengthener (like OPI Nail Envy) daily and avoid polish for a week or two.
Problem: Skin’s Dry and Cracked
- Fix: Slather on a thick cream (I love Aquaphor) and wear gloves overnight—your hands will feel brand new by morning.
Aftercare: How to Baby Your Nails Back to Health
Removing acrylics is only half the battle—your natural nails need some serious love afterward. Think of them like a plant that’s been in the shade too long—they need water, nutrients, and a little sunshine to thrive again.
Daily Habits for Happy Nails
- ✔️ Moisturize: Use cuticle oil 1-2 times a day. It’s like a smoothie for your nails!
- ✔️ Go Bare: Skip polish for a few days to let your nails breathe.
- ✔️ Eat Smart: Foods rich in biotin (like eggs and almonds) boost nail strength—science says so!
- ❌ No Picking: Resist the urge to peel off any leftover bits—it’s a trap!
Product Picks
| Product | Why It’s Awesome | Where to Get It |
|---|---|---|
| CND SolarOil | Hydrates and smells divine | Amazon, Sally’s |
| OPI Nail Envy | Strengthens weak nails fast | Ulta, Target |
| Aquaphor | Heals dry skin overnight | Drugstores |
How Often Should You Wear Acrylics? The Truth
Love acrylics but worried about damage? Here’s the deal: your nails can handle them, but they need breaks. Experts suggest removing acrylics every 6-8 weeks and letting your nails go bare for at least a week between sets. Why? Constant wear weakens the nail plate over time—think of it like overtraining at the gym without rest days.
Nail tech Rita Pinto shared with Glamour, “Your natural nails grow out regardless of how long your acrylics last, and you’ll start to see growth at your cuticle beds after two weeks.” So, give them a breather—your future mani will look even better!
Bonus: Fun Nail Trivia to Impress Your Friends
While you’re soaking those nails, here’s some quirky stuff to chat about at your next hangout:
- Nail Art History: Ancient Egyptians used henna to dye their nails—way before acrylics were a thing!
- Longest Nails Ever: Lee Redmond grew hers to 28 feet before a car accident in 2009. Imagine typing with those!
- Why Pinkies Break Less: Your pinky nail grows slowest, so it’s less prone to damage—random, right?
Let’s Chat: Your Turn!
You made it to the end—congrats! Now, I want to hear from you. What’s your go-to trick for removing acrylics? Have a horror story from a DIY gone wrong? Drop it in the comments below—I’m all ears! Oh, and if you try these steps, tag me on social media (I’m @NailNerd25—fake handle, but you get the vibe!). Let’s keep the nail convo going—because who doesn’t love a good mani moment?
Happy nail prepping, fam! Your natural nails are about to shine brighter than ever. 💅


