Blog
How to Get Gel Nails Off: The Ultimate Guide to Safe Removal at Home
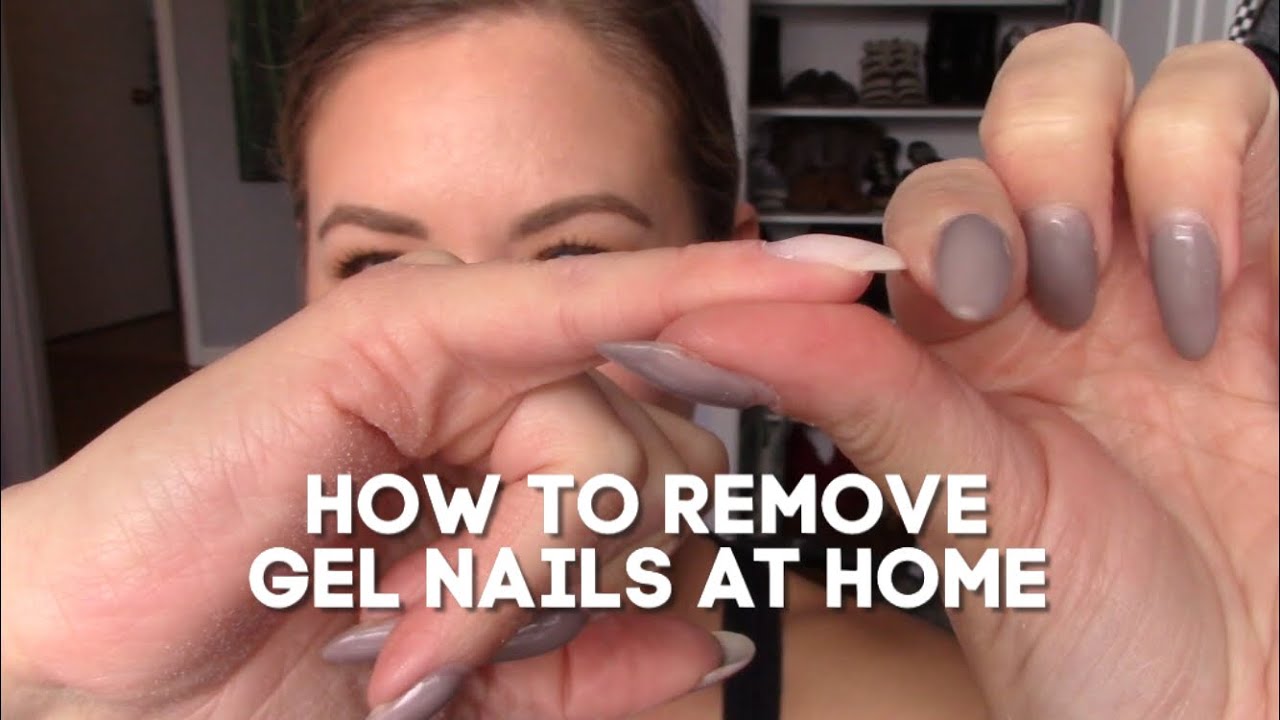
How to Get Gel Nails Off: The Ultimate Guide to Safe Removal at Home
Gel nails are the ultimate beauty hack—shiny, chip-free, and long-lasting. But when it’s time to take them off, things can get tricky. Have you ever stared at your peeling gel polish, tempted to rip it off like a Band-Aid? Trust me, I’ve been there, and it’s not pretty. Your nails deserve better! Whether you’re a gel mani newbie or a seasoned pro, this guide will walk you through everything you need to know about removing gel nails safely, with tips you won’t find just anywhere. From secret hacks to the latest research, I’ve got you covered with a step-by-step plan that’ll keep your nails healthy and happy. Ready to dive in? Let’s get those gels off the right way!
Why Gel Nails Are Tough to Remove (And Why It Matters)
Gel nail polish isn’t your average manicure. It’s cured under a UV or LED light, creating a hard, durable layer that sticks to your nails like glue. That’s why it lasts for weeks without chipping—but it’s also why you can’t just swipe it off with regular polish remover. Knowing how it works helps you understand why removal needs a little extra TLC.
The gel’s tough bond is made of chemicals like methacrylate, which harden into a shell. Picking or peeling it off might feel satisfying (guilty!), but it can rip off layers of your natural nail, leaving them weak and brittle. Studies from the American Academy of Dermatology show that improper removal is the top reason for nail damage after gel manicures. So, let’s avoid that drama and do it right!
The Biggest Mistakes People Make When Removing Gel Nails
Before we get to the good stuff, let’s talk about what not to do. I’ve learned these the hard way—chipped nails, sore cuticles, and a whole lot of regret. Here’s what fans like us often mess up:
❌ Peeling It Off Like a Sticker
It’s tempting, right? The edges lift, and you think, “I’ll just yank it off!” But this tears your nail bed, causing white spots or even permanent thinning.
❌ Using Too Much Force
Scraping with metal tools or digging at the polish can scratch your nails and cuticles. I once used a fork (don’t judge!), and it was a disaster.
❌ Skipping Protection
Acetone, the magic gel remover, can dry out your skin and nails if you don’t shield them. Ever had cracked cuticles after a removal? That’s why.
❌ Rushing the Process
Patience isn’t my strong suit either, but rushing means leftover gel or damaged nails. Slow and steady wins this race!
Avoid these traps, and your nails will thank you. Now, let’s get into the fun part—how to do it like a pro.
What You’ll Need: Your Gel Removal Toolkit
Getting gel nails off doesn’t require a fancy salon trip. You can do it at home with stuff you might already have! Here’s your must-have list:
- 100% Pure Acetone: Regular nail polish remover won’t cut it—gel needs the strong stuff.
- Cotton Balls or Pads: For soaking up the acetone.
- Aluminum Foil: Cut into small squares to wrap your nails.
- Nail File (Medium Grit): To buff off the top layer gently.
- Cuticle Pusher or Orange Stick: For nudging off softened gel.
- Petroleum Jelly or Cuticle Oil: To protect your skin.
- Warm Towel: Optional, but it speeds things up!
- Moisturizer: For aftercare—your hands will need it.
Got everything? Great! If not, a quick drugstore run will set you up. Now, let’s break it down step by step.
Step-by-Step: How to Remove Gel Nails at Home
Here’s the foolproof way to get gel nails off without wrecking your natural ones. I’ve added some insider tricks I’ve picked up from trial and error—things even my nail-obsessed friends didn’t know!
Step 1: Prep Your Space
Set up in a comfy spot with good air flow—acetone smells strong. Lay down a towel or plastic wrap to protect your table (I learned this after ruining my favorite coffee table).
✔️ Pro Tip: Play some music or a podcast. This takes about 20-30 minutes, so make it fun!
Step 2: Buff the Top Layer
Use your nail file to gently sand off the shiny top coat of the gel. You’re not trying to remove all the polish—just break the seal so the acetone can soak in. Stop when it looks dull, not bare.
✔️ Secret Hack: Angle the file like you’re sketching a rainbow—light, curved strokes keep you from overdoing it.
Step 3: Protect Your Skin
Dab petroleum jelly or cuticle oil around your nails and cuticles. This creates a barrier against the drying acetone. I once skipped this and ended up with flaky skin for days—lesson learned!
✔️ Fan Favorite: “I use Vaseline every time now—it’s a game changer!” says nail artist Tracy Lee Percival.
Step 4: Soak with Acetone
Tear cotton balls into pieces big enough to cover each nail. Soak them in acetone, place one on each nail, and wrap with foil to lock it in. Make it snug but not tight—think cozy, not strangling.
✔️ Time Saver: Wrap a warm towel around your hands to heat things up. The gel softens faster—I swear by this!
Step 5: Wait It Out
Let your nails soak for 10-15 minutes. Check one nail first—if the gel isn’t lifting, wait another 5. Patience is key here. I like to scroll TikTok or daydream about my next mani while I wait.
✔️ Did You Know?: Thicker gel layers (like builder gel) might need 20 minutes. Test and see!
Step 6: Gently Remove the Gel
Peel off the foil and cotton. The gel should look flaky or gooey. Use your cuticle pusher to nudge it off gently—no scraping! If it’s stubborn, re-soak for a few more minutes.
✔️ Avoid This: Don’t force it. Leftover bits mean more soaking, not more muscle.
Step 7: Clean Up
Wash your hands with warm water and mild soap to get rid of acetone residue. Dry them, then buff any rough spots with a soft file. Finish with a big dollop of moisturizer and cuticle oil.
✔️ Aftercare Boost: Massage the oil in like a mini spa treatment—your nails will feel pampered!
That’s it! Your nails are gel-free and ready for whatever’s next. But wait—there’s more to explore!
Alternative Methods: No Acetone? No Problem!
Not everyone loves acetone (it’s harsh, I get it). Here are two lesser-known ways to ditch the gel without it. These take longer but can save your nails from drying out.
Method 1: Grow It Out
Let your nails grow until the gel is near the tip, then clip it off bit by bit. It’s slow—about 6 months for fingernails, 12-18 for toenails, per dermatologist Shari Lipner, MD—but it’s the safest option.
✔️ Why Fans Love It: No chemicals, no damage. Perfect if you’re in no rush!
❌ Downside: You’ll need patience and a good nail clipper.
Method 2: File It Off (Carefully!)
Use a medium-grit file to sand down the gel layer by layer. Stop before you hit your natural nail, then smooth with a buffer.
✔️ Cool Fact: Musicians use this for hard gel overlays—it’s precise!
❌ Watch Out: Too much filing thins your nails. Go slow and check often.
These tricks aren’t as fast, but they’re gentler. Pick what fits your vibe!
Hard Gel vs. Soft Gel: What’s the Difference?
Not all gel nails are the same, and that affects how you remove them. Here’s the scoop:
| Type | Description | Removal Method |
|---|---|---|
| Soft Gel | Flexible, used for polish or Gel-X tips | Soaks off with acetone |
| Hard Gel | Stiff, for extensions or overlays | File off (acetone-resistant) |
I once tried soaking hard gel for an hour—nothing happened! If you’re not sure which you have, test a nail with acetone. No budge? It’s hard gel—grab that file.
The Science Behind Healthy Nails Post-Removal
Your nails aren’t just decoration—they’re made of keratin, a tough protein. Gel removal can stress them out, but research has your back. A 2023 study from the Journal of Cosmetic Dermatology found that acetone exposure dries out nails, but moisturizing right after cuts damage by 40%.
✔️ Expert Insight: “Hydration is everything after gel removal,” says dermatologist Marisa Garshick, MD. “It restores the nail’s natural barrier.”
So, slather on that lotion and oil—science says it’s a must!
Insider Tips You Won’t Find Anywhere Else
Here’s where I spill my secrets—stuff I’ve picked up from late-night nail experiments and chats with fellow gel lovers:
- Warm Water Soak First: Dip your nails in warm water for 5 minutes before acetone. It softens the gel slightly, making removal smoother.
- DIY Nail Clips: No foil? Use plastic sandwich bags and clip the ends with hair clips—works like a charm!
- Flavor Hack: Add a drop of essential oil to your acetone. It won’t weaken it but makes the smell bearable. Lavender’s my go-to.
- Double Duty: Buff your nails before and after removal for a polished look without polish.
These quirks make the process fun and personal—try them out!
Aftercare: Keep Your Nails Strong and Gorgeous
Removal’s done, but the job’s not over. Your nails need love to bounce back. Here’s your aftercare plan:
- Moisturize Daily: Use a thick hand cream and cuticle oil for a week. Dry nails break easier.
- Go Bare: Give your nails a breather—no polish for a few days. Let them recover!
- Strengthen Up: Try a nail hardener if they feel weak. I swear by ones with calcium.
- Trim Smart: File nails in one direction to avoid splits. Sawing back and forth is a no-no.
✔️ Fun Fact: Nails grow about 1mm a week, so pamper them now for a fresh start!
FAQs: Your Burning Questions Answered
Fans always have questions, so I’ve tackled the big ones:
Q: Can I reuse the foil wraps?
A: Yep! Rinse them with soap and water, dry, and they’re good for next time. Eco-friendly and budget-smart!
Q: What if my nails hurt after?
A: Ouch—that’s from too much scraping or acetone. Soothe with oil and skip polish for a few days.
Q: How often is too often for gel nails?
A: No strict rule, but a month-long break every 3-4 manicures keeps nails healthy, says the pros.
Got more? Drop them below—I’m here to help!
The Latest Trends in Gel Removal (2025 Edition)
What’s new in the nail world? I’ve dug into 2025’s hottest updates:
- Gel Dissolver Kits: Brands now sell pre-soaked pads that skip the cotton-and-foil mess. Faster, less fuss!
- Eco Acetone: Plant-based removers are popping up. They’re gentler but take longer—worth a try if you’re green-minded.
- Nail Drills for Home: Mini drills are trending for hard gel. Use low speed and practice first!
Stay ahead of the curve with these—I’m testing the dissolver pads next week!
Let’s Talk: Your Turn!
You’ve got the full rundown—now it’s your turn to shine. What’s your go-to removal trick? Ever tried something wild that worked? Share in the comments—I’m dying to hear your stories! And if your nails are looking fab post-removal, tag me on socials with #GelGoneRight. Let’s keep this nail party going!
This guide’s packed with everything you need to master gel nail removal—safe, easy, and with a little flair. From the basics to secret hacks, you’re ready to take on those gels like a boss. Happy removing, nail fam!


