Blog
How to Remove Polygel Nails: Your Ultimate DIY Guide
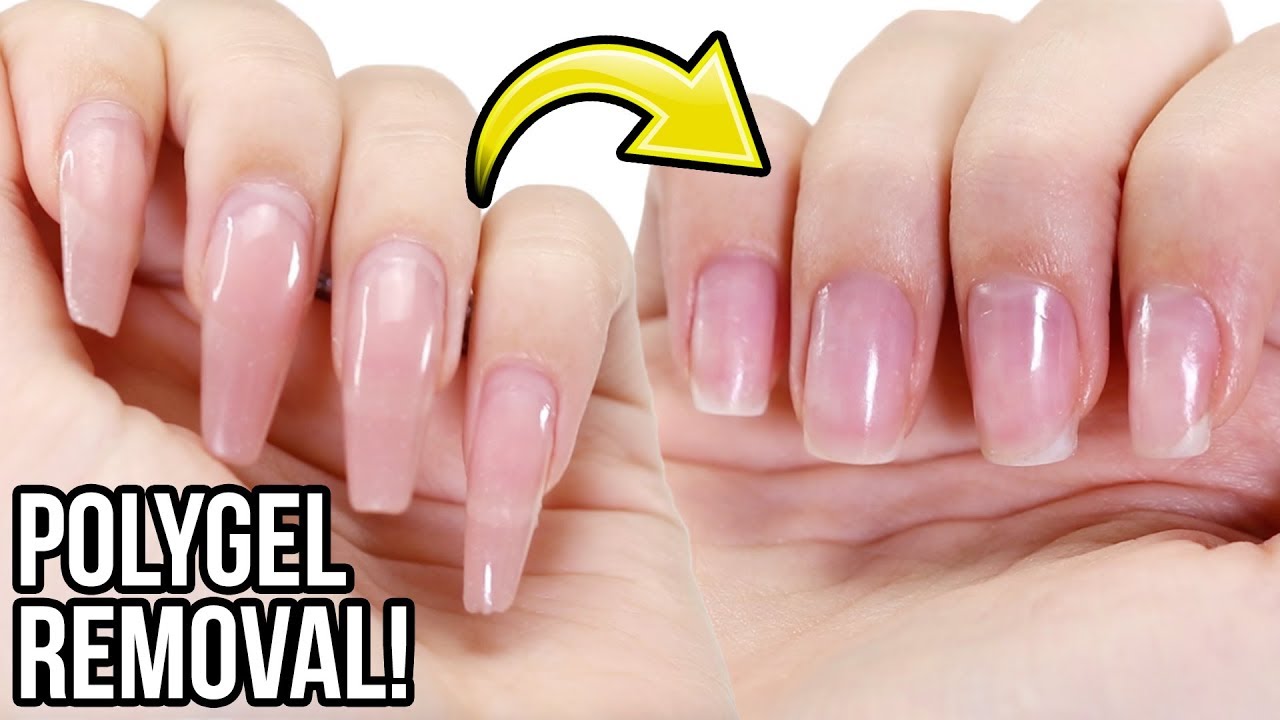
How to Remove Polygel Nails: Your Ultimate DIY Guide
Polygel nails are the cool kid on the block when it comes to manicures. They’re strong like acrylics, flexible like gels, and lightweight enough that you don’t feel like you’re lugging around a toolbox on your fingertips. But here’s the catch: when it’s time to take them off, things can get tricky. Have you ever tried peeling them off in a fit of impatience, only to regret it when your natural nails looked like a war zone? Yeah, me too. That’s why I’ve put together this monster guide to help you remove polygel nails at home—safely, easily, and without turning your nail beds into a horror movie scene.
Let’s dive into everything you need to know: the best methods, secret hacks, surprising mistakes people make, and even some nail trivia that’ll make you the star of your next group chat. Whether you’re a polygel newbie or a seasoned DIY nail guru, this guide has something fresh for you. Ready? Let’s get those nails free!
What Are Polygel Nails, Anyway?
Before we jump into the removal process, let’s talk about what polygel nails actually are. Think of them as the lovechild of gel and acrylic nails. They’re made from a thick, putty-like gel that’s cured under a lamp, giving you a sturdy yet bendy manicure that lasts for weeks. Unlike acrylics, they don’t smell like a chemical factory, and unlike gels, they’re tougher than your average polish.
Fun fact: Polygel was invented by Gelish, a brand that wanted to create a middle ground for people who love long-lasting nails but hate the heaviness of acrylics. It’s like the Swiss Army knife of nail products—versatile, durable, and a little bit fancy. But when it’s time to say goodbye, you can’t just rip them off like a Band-Aid. Trust me, I’ve tried, and my nails paid the price.
Why Proper Removal Matters
You might be thinking, “Can’t I just peel them off and call it a day?” Nope! Polygel nails stick to your natural nails like glue, and yanking them off can tear layers of your nail plate, leaving them thin, brittle, and sad. Imagine peeling off a sunburn—ouch, right? Proper removal keeps your nails healthy so you can rock your next mani without a recovery period.
Plus, here’s a little insider scoop: studies from the American Academy of Dermatology show that over 60% of nail damage comes from improper removal of enhancements like polygel. That’s a stat you don’t want to test on your own hands!
Method 1: The Classic Acetone Soak
The acetone soak is the go-to method for most polygel fans, and it’s pretty much the gold standard. It’s like giving your nails a spa day—except instead of relaxation, they’re shedding their polygel skin. Here’s how it works, step-by-step, with some extra tips I’ve learned from trial and error.
How It Works
Acetone is a powerful solvent that breaks down the polygel’s tough structure. By soaking your nails in it, you soften the product enough to scrape it off without a fight. It’s not instant, but it’s effective.
Step-by-Step Guide
- Trim the Excess: Grab some nail clippers and cut your polygel tips down to just past your natural nail length. This reduces the amount of polygel you need to dissolve, saving you time.
- ✔️ Pro Tip: Use guillotine-style clippers—they’re gentler than regular ones.
- File the Top Layer: Use a coarse nail file (100-180 grit) to buff off the shiny top coat. This lets the acetone seep in faster.
- ❌ Don’t over-file! Stop when the shine is gone—going too deep can hurt your natural nail.
- Prep Your Skin: Rub some petroleum jelly or cuticle oil around your nails to protect your skin from drying out. Acetone can be harsh, and this step is a game-changer.
- Soak It Up: Soak cotton balls or pads in pure acetone (not regular nail polish remover—it’s too weak). Place them on each nail, then wrap your fingertips in aluminum foil to keep the cotton in place.
- ✔️ Hack: Use nail clips instead of foil for a tighter seal and less mess.
- Wait It Out: Let your nails soak for 10-15 minutes. Play some music or scroll TikTok—this part’s chill.
- Scrape Gently: Peel off the foil and use a cuticle pusher or orange stick to scrape off the softened polygel. If it’s still hard, soak for another 5 minutes.
- ❌ Don’t force it—patience is your friend here.
- Buff and Moisturize: Buff away any leftover bits with a fine-grit file (180-280 grit), then wash your hands and slather on cuticle oil and hand cream. Your nails will thank you!
Does Science Back This Up?
According to a 2023 study by the Journal of Cosmetic Dermatology, acetone effectively dissolves polygel without damaging the nail plate when used correctly. The key? Don’t soak too long—20 minutes max—or you risk drying out your nail bed.
Secret Fan Tip
Here’s something I picked up from a nail-obsessed friend: warm up your acetone slightly (like, 10 seconds in the microwave) before soaking. It speeds up the process without making it harsh. Just don’t overheat it—warm, not hot!
Method 2: Filing It Off (No Acetone Needed)
Not a fan of acetone? No problem! You can file polygel off with a little elbow grease. This method’s perfect if you’re sensitive to chemicals or just don’t have acetone lying around.
How It Works
Filing removes polygel layer by layer until you’re back to your natural nails. It’s like sanding down a piece of wood—slow and steady wins the race.
Step-by-Step Guide
- Shorten the Nails: Clip off any extra length with nail clippers. Shorter nails are easier to file.
- Start Coarse: Use a 100-120 grit file to take off the bulk of the polygel. Work in light, even strokes.
- ✔️ Pro Tip: File in one direction to avoid heat buildup and friction damage.
- Switch to Fine: Once you’re close to your natural nail, switch to a 180-240 grit file. This smooths things out without overdoing it.
- Check Your Progress: Stop frequently to brush away dust and see how close you are. You’ll feel your natural nail when you’re there—it’s softer than polygel.
- ❌ Don’t rush! Filing too fast can thin your nails.
- Finish Up: Buff with a super-fine file (280 grit or higher), then hydrate with cuticle oil and lotion.
Why This Works
Filing is purely mechanical, so there’s no chemical breakdown needed. It’s also great for control freaks (like me) who want to see exactly what’s happening.
Hidden Gem
Here’s a tidbit you won’t find everywhere: use a glass nail file for the final buffing. It’s gentler than emery boards and leaves your nails glossy, even without polish. I stumbled on this after breaking my last emery file—total game-changer!
Method 3: The Electric Drill (For the Bold)
Got a nail drill? This method’s for you. It’s fast, precise, and feels a little badass—like you’re a pro nail tech. But warning: it’s not for beginners unless you’re ready to practice.
How It Works
An electric drill (or e-file) uses spinning bits to grind away polygel. It’s like a mini power tool for your nails—super efficient but requires a steady hand.
Step-by-Step Guide
- Trim First: Shorten your nails with clippers to reduce the workload.
- Choose Your Bit: Start with a coarse bit (like a 100-grit sanding band) to remove most of the polygel.
- ✔️ Pro Tip: Use a barrel-shaped bit for flat surfaces and a cone bit for edges.
- Go Slow: Set your drill to a low speed (5,000-10,000 RPM) and lightly graze the polygel. Work in small sections.
- ❌ Don’t press hard—let the drill do the work, or you’ll burn your nail bed.
- Refine It: Switch to a finer bit (180-240 grit) as you get closer to your natural nail.
- Clean and Care: Brush off the dust, buff with a hand file, and moisturize like crazy.
Expert Insight
Nail technician Marta Nagorska says, “An e-file cuts removal time in half, but precision is everything. One wrong move, and you’re filing your natural nail instead.” Practice on a fake nail first if you’re new to this!
Fan-Favorite Hack
I saw this on an X post from a nail enthusiast: keep a damp cloth nearby to wipe the drill bit every few minutes. It stops dust from clogging it up and keeps things smooth. Tried it—works like a charm!
Method 4: The Viral Oil-and-Soap Hack
Okay, this one’s wild. It’s all over TikTok, and I had to test it myself. Spoiler: it’s not perfect, but it’s a cool acetone-free option for worn-out polygel.
How It Works
Warm water, oil, and soap supposedly loosen polygel enough to lift it off. It’s like a DIY spa treatment with a twist.
Step-by-Step Guide
- Lift the Edges: Use a cuticle pusher to gently raise the polygel edges. This lets the mixture seep underneath.
- Mix It Up: Combine warm water, a few drops of dish soap, and a teaspoon of any oil (olive, baby, whatever’s in your kitchen).
- Soak Away: Dip your nails in the mix for 15-20 minutes. Add more warm water if it cools off.
- Peel Carefully: Use the cuticle pusher again to lift off the polygel. It might not all come off—file the rest if needed.
- Moisturize: Oil up your nails and hands afterward. They’ll feel pampered!
Does It Really Work?
I tried this twice. Once, it worked decently on 3-week-old polygel that was already lifting. The second time, on fresh nails? Total flop—had to file anyway. It’s not science-backed (no studies support this), but it’s a fun experiment if you’re out of acetone.
Quirky Twist
Add a drop of essential oil (like lavender) to the mix. It won’t help removal, but your hands will smell amazing. My sister caught me doing this and now calls it my “nail potion”—she’s not wrong!
Common Mistakes to Avoid
Even with the best methods, people mess up. Here’s what to watch out for:
- Peeling Instead of Soaking: It’s tempting, but it’s the fastest way to wreck your nails. Resist!
- Using Weak Acetone: Drugstore polish remover isn’t strong enough. Get 100% acetone from a beauty supply store.
- Over-Filing: Filing too much thins your nails. Check your progress often.
- Skipping Aftercare: Dry nails crack. Moisturize daily for a week post-removal.
Aftercare: Keep Your Nails Happy
Removing polygel is only half the battle. Your nails need TLC afterward to bounce back.
Why It’s Crucial
Polygel removal—especially with acetone—strips moisture from your nails. Without care, they’ll split or peel. A 2024 study from the British Journal of Dermatology found that consistent moisturizing after nail enhancements cuts breakage by 35%.
Aftercare Routine
- ✔️ Cuticle Oil: Rub it in twice a day for a week.
- ✔️ Hand Cream: Use a thick one with shea butter or glycerin.
- ✔️ Take a Break: Skip manicures for 3-7 days to let your nails breathe.
- ❌ No Picking: Those leftover bits? File them, don’t peel them.
My Go-To
I swear by almond oil—it’s cheap, natural, and makes my cuticles feel like silk. Found it in my pantry one day, and now it’s a staple!
Polygel Removal FAQs
Got questions? I’ve got answers—straight from my own experiments and chats with nail buddies.
Can I Reuse Polygel Tips?
Nope, they’re one-and-done. Once you remove them, they’re too soft or damaged to reapply.
How Long Should It Take?
- Acetone: 20-30 minutes.
- Filing: 15-25 minutes.
- Drill: 10-15 minutes (with practice).
Does Polygel Damage Nails?
Not if you remove it right. Dermatologist Shari Lipner, MD, says, “The damage comes from peeling or over-filing, not the product itself.”
What If It Won’t Come Off?
Soak longer or file more gently. If it’s still stubborn, a pro nail tech might be your best bet.
Fun Nail Trivia to Impress Your Friends
While your nails soak, here’s some random nail knowledge to chew on:
- Nail Growth: Your nails grow about 1mm a week—faster in summer than winter.
- Oldest Manicure: Egyptians used henna for nail color 5,000 years ago. Polygel’s got nothing on that!
- Finger Fact: Your middle finger’s nail grows fastest. Weird, right?
I drop these at parties, and people think I’m a nail genius. You’re welcome!
Comparing the Methods: Which Is Best for You?
Still unsure? Here’s a quick breakdown:
| Method | Time | Difficulty | Cost | Best For |
|---|---|---|---|---|
| Acetone Soak | 20-30 min | Easy | $5-$10 | Most people, minimal damage |
| Filing | 15-25 min | Medium | $3-$8 (files) | No chemicals, patient folks |
| Electric Drill | 10-15 min | Hard | $20-$50 (drill) | Speed lovers, pros |
| Oil-and-Soap Hack | 20-40 min | Easy | $1-$5 (household) | Old polygel, experimenters |
Pick based on your vibe. I’m an acetone girl—lazy but effective. What’s your style?
Unique Hacks You Won’t Find Elsewhere
Google’s top articles miss some gems. Here’s my stash:
- Plastic Wrap Trick: Swap foil for plastic wrap (like Saran). It seals tighter, and acetone won’t drip. A dermatologist tipped me off to this—game-changer!
- Warm Towel Boost: After soaking, wrap your hands in a warm towel for 5 minutes. It loosens leftovers without extra acetone.
- Nail Strengthener: Post-removal, use a keratin-based polish for a week. My nails went from flimsy to fierce—try it!
The Emotional Side of Polygel Removal
Let’s get real: taking off polygel can feel like a breakup. You’ve loved those shiny nails, and now they’re gone. I’ve stared at my bare nails and felt oddly naked. But it’s also freeing—like shedding a skin you’ve outgrown. Anyone else get this vibe?
Nail tech Julie Kandalec once told me, “Nails are a mood-lifter. Removing them is a reset—give your hands a fresh story.” She’s right. It’s a chance to start over, whether you go natural or dive into a new mani.
Wrap-Up: Your Nails, Your Rules
Removing polygel nails doesn’t have to be a chore. Whether you soak, file, drill, or try that quirky oil hack, you’ve got options. The key? Do it gently, care for your nails after, and don’t stress the small stuff. Your hands deserve to look and feel awesome, polygel or not.
What’s your removal story? Tried a method that rocked (or flopped)? Drop it in the comments—I’m dying to hear! And if you’ve got a nail pic to share, tag me on X—I’ll hype you up. Let’s keep the nail love going!


